|
.:. How to Make Maps |
|
Here is a complete guide for you about how to make maps like I do. This way you'll be a "pro mapper" just as I am :) . Don't hesitate to contribute your maps to complete this website !
|
|
.:. Required
Softwares |
In order to create maps you'll need
these softwares :
- Photoshop (5, 6 or 7) : you
can get a free trial version on
Adobe's official site.
- Visual Boy Advance (1.2) :
get this great emulator for free
right here.
- A rom of any THPS game for
GameBoy Advance. To get a rom you can download it on the internet
(I won't give you any link), or you can dump it yourself with a
Flash Advance Linker.
[WARNING : If you haven't bought the game,
you don't have the right to own the rom]
|
|
.:. Step by Step
Guide |
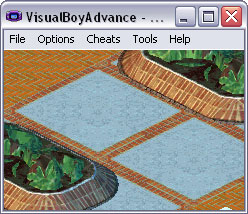
[1] First of all, just start your emulator (Visual Boy Advance 1.2) with any THPS GBA rom.
[2] And then, start a new game (I advise you choose Freeskate to avoid Time limit) on the level you want to map.
[3] Now you're about to start taking screenshots. But before this, you have to off a layer in the game with thanks to a new feature of Visual Boy Advance 1.2. Simply press CTRL+5, and now you'll only have the map on the screengame, no more character or any objects. Now you should be ready to take a screen capture : File -> Screen Capture.... Always pause the emulator (CTRL+P) before taking a screen capture !
[4] Then you just have to make many screenshots like this at different places. Take a screen capture, then move a little bit, then take a new screen capture, etc... Usually I take about 30 screenshots, and then I run Photoshop.
 
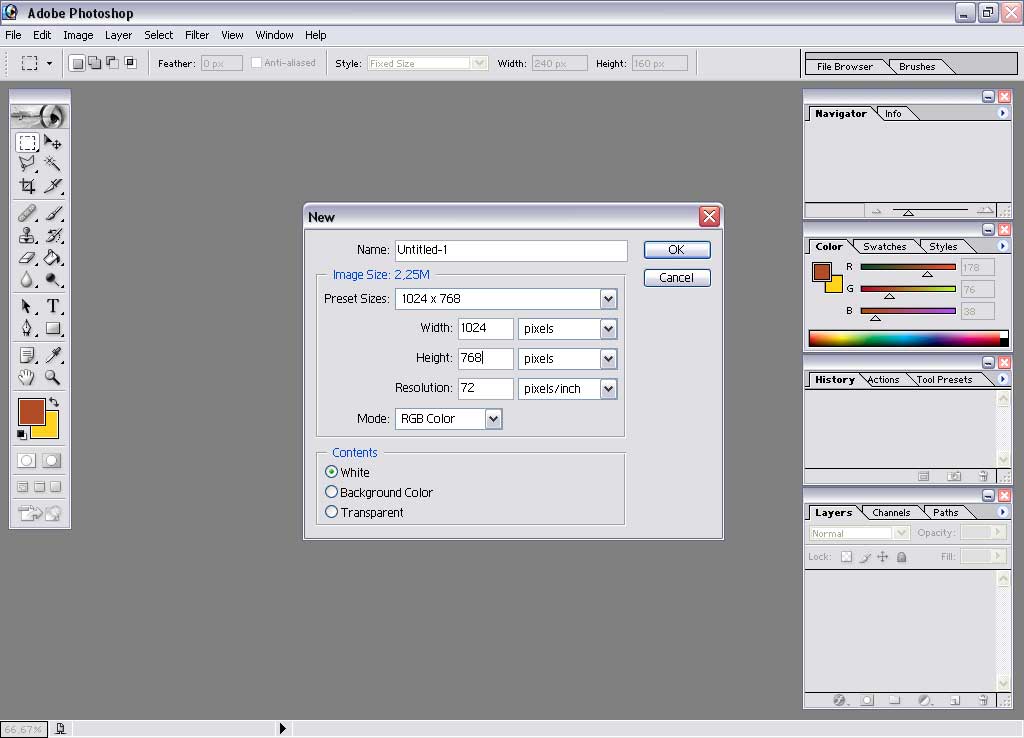
[5] When you think you have enough screenshots to start mapping, then run Photoshop and create a new file (I advise to create a big file since the map will be huge !).

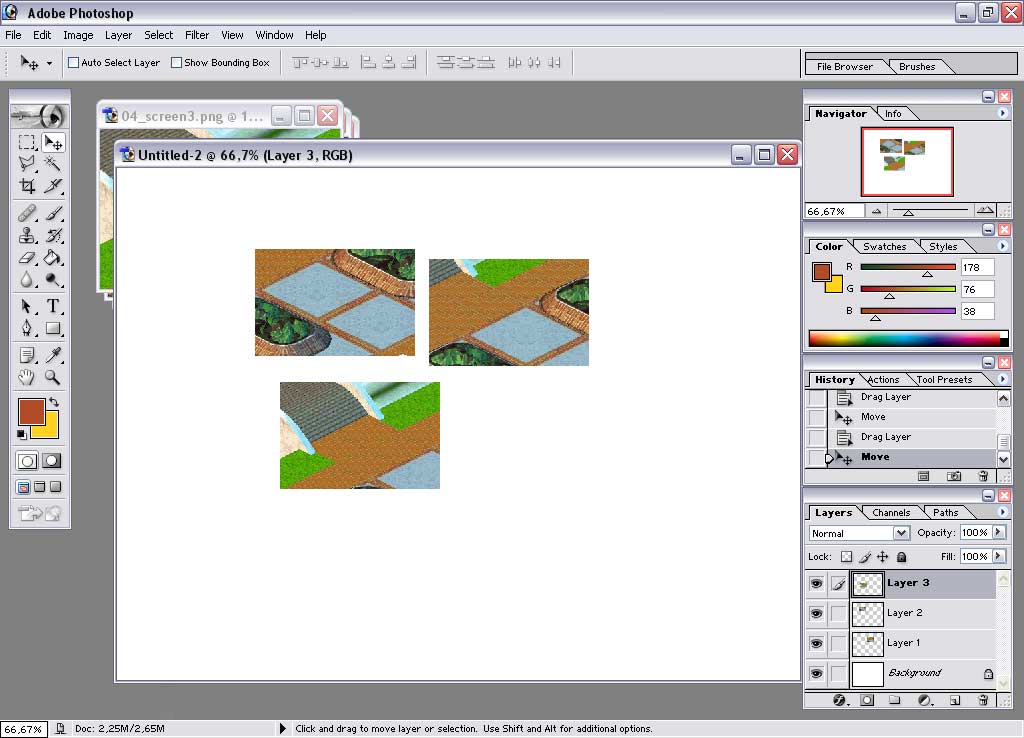
[6] Import (drag and drop) your screenshots in your empty file (don't import every screenshot at the same time ! I advise to import about 4, assemblate them and then import the next 4, etc...).
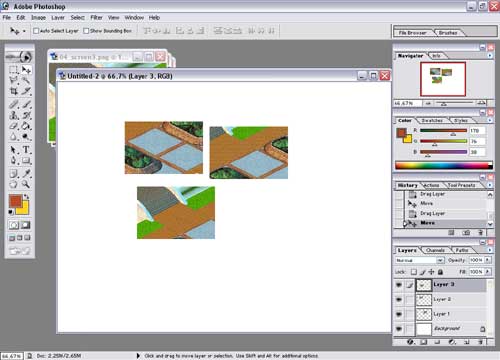
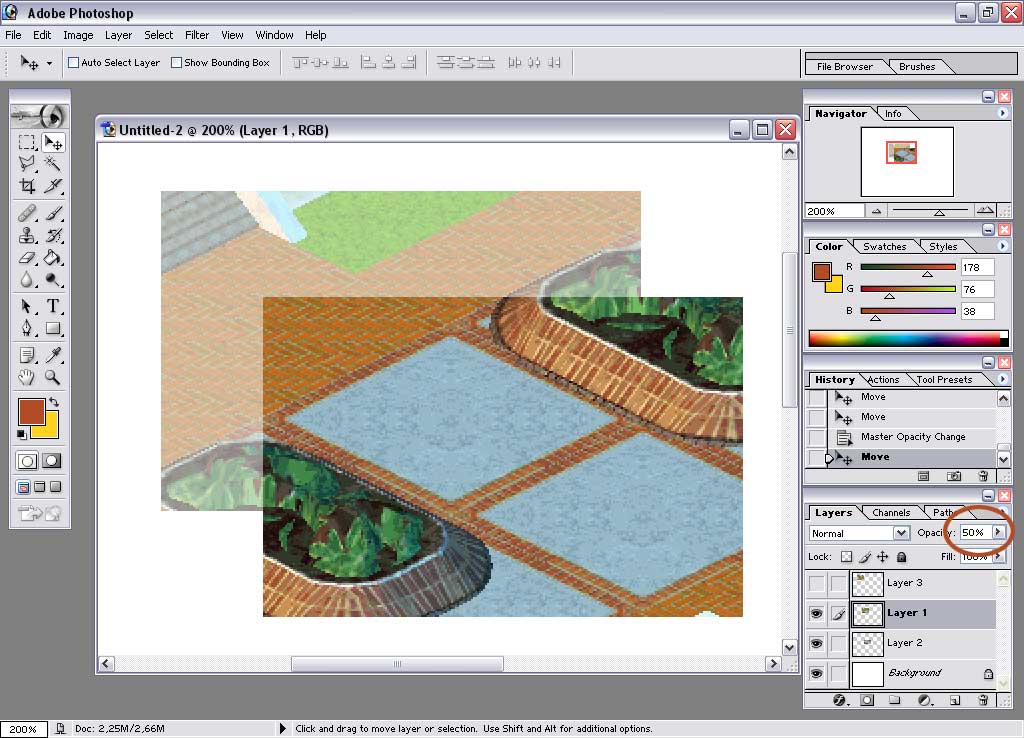
[7] Here comes the most difficult part. You'll have to deal with the screenshots' layer's opacity to make them match exactly with each other. So just select two screenshots (hide the others), then set the opacity of the upper layer to 50 %, and move this layer to superimpose it exactly with the one behind. Then when you're done, put the opacity of the first layer back to 100 % and merge layers (CTRL+E).

[8] Then you just have to repeat the previous operation forever (or almost) until you've got your entire map !

[Know Problems] Visual Boy Advance is not perfect, and sometimes it can happen that there's a slight delay in a place of the picture. You'd better watch out for those, because it can completly throw into disorder your map ! So when this happens, the only thing to do is to use Photoshop, select the are which is delayed and then place it correctly (screenshots will come soon to explain this better).
|
|